How to Make a Personalized Comic Book You Can Edit Page by Page
Most personalized comic books are written for you. This guide shows how to make one where you write the story, then change any speech bubble, panel or character until the comic sounds exactly like the people in it.
Last reviewed . Written by our editorial team from how the myComics editor works in November 2026. The steps describe our own product, so the tips are specific to it, though the advice on photos, scenes and dialogue applies to any comic tool.
By the myComics.ai Editorial Team8 min read
Step by step guide · Editor walkthrough · Editorial disclosure
Quick answer
- You can make your own personalized comic book without drawing: add a photo of each person, describe the story in plain words, pick an art style, and the pages are generated for you.
- The difference between a good comic and a great one is the editing. On myComics every speech bubble and caption is text you can rewrite, and any panel or page can be redrawn from a new scene description.
- Fix things in this order: the cast first, then the story beats, then the art, then the words. It saves time and credits.
- Nothing is printed until you order, so you can read the whole comic as the recipient would and fix the last line that does not sound like them.
If you want to make your own comic book starring real people, the hard part used to be the drawing. Today the art can be generated from photos in minutes, so the hard part has moved: it is getting the comic to say exactly what you want. A comic where your dad says something he would never say, or where the best joke is missing, is not much of a gift.
That is why this guide is about editing as much as making. Most personalized comic book services write the story for you from a template and let you change a few details. Here you will make a personalized comic book where you write the story, then change any speech bubble, panel, character or page until it is right. We will use the myComics editor because it is the one we know, but the habits work anywhere.
What do you need before you start?
You need less than you think, but a little preparation pays off.
- One clear photo of each person. Front facing, good light, no sunglasses, the whole face visible. One great photo beats five blurry ones. You can add up to six characters, and pets work too.
- Three or four moments, not a life story. Write down the scenes you want on the page: the night you met, the camping trip where the tent collapsed, the way your sister always takes the last slice. Specific moments make better pages than summaries.
- A few real phrases. Write down how the people in the story actually talk. Their catchphrases, nicknames and running jokes are what the recipient will recognize first.
- An idea of the tone. Romantic, silly, epic, cozy. It decides the art style and how the dialogue should sound.
You do not need a script, drawing skills or design software. If you want more background on the different routes, our guide on how to make a comic book without drawing compares them.
How do you make a personalized comic book, step by step?
Here is the whole process from a blank page to a comic you can read.
- Add your characters. Start a new comic and upload a photo for each person. Give each one a name, the name they will be called in the speech bubbles. If someone appears only once, they can still be a character.
- Describe the story in plain words. Write a short paragraph: who is in it, where it happens, and the moments you noted. For example: “Anna and Leo get lost on the way to their own wedding. Leo insists he knows a shortcut. They end up at a goat farm, borrow a tractor and arrive just in time.” Plain sentences work better than clever ones.
- Pick an art style. There are more than twenty, from manga and classic American comics to soft watercolor and cartoon. Match it to the tone. A love story in a gritty noir style can be funny, but only if that is the joke.
- Generate the first pages. The characters are built from your photos, the story is split into pages and panels, and the dialogue is lettered into speech bubbles. This usually takes a few minutes.
- Read it once without touching anything. Before editing, read the pages straight through. Make a short list: what is wrong with the cast, which scenes are missing, which panels look off, which lines do not sound right. Then fix them in that order.
If you are starting from a photo album rather than an idea, the guide on how to turn photos into a comic shows how to pick the shots that work best as panels.
How do you edit the speech bubbles and captions?
This is the edit you will make most, and the one that turns a generated comic into your comic.
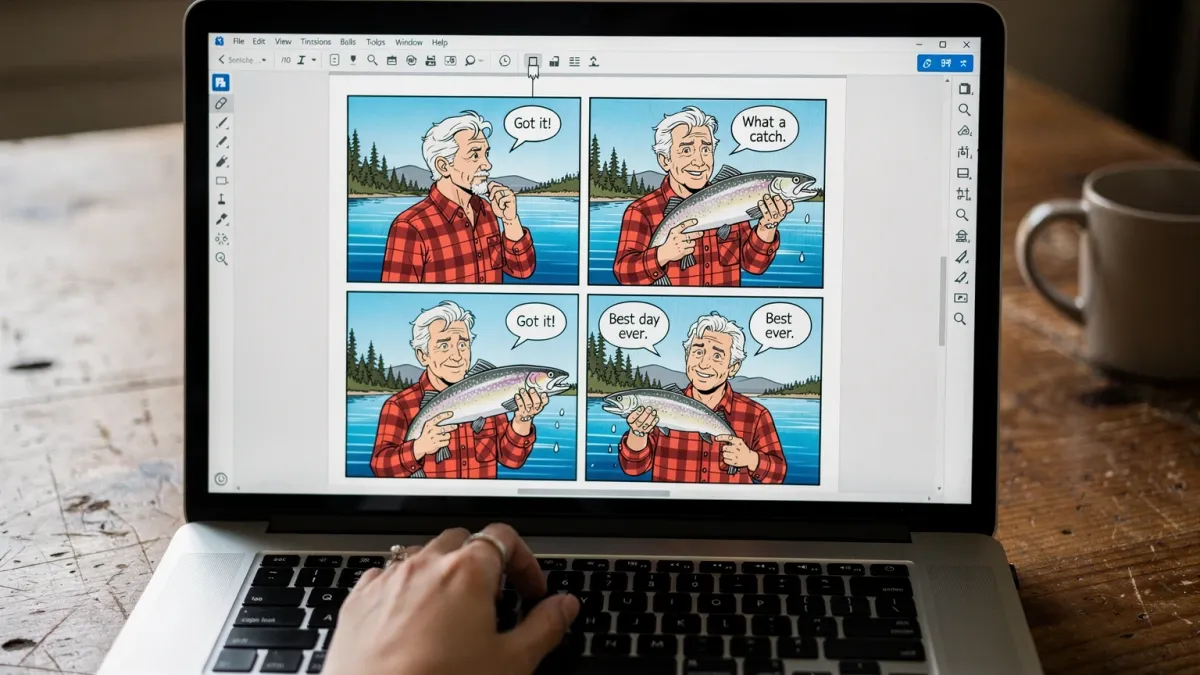
In the editor, tap any speech bubble or caption and type. The words change in place and the art stays as it is, so you can rewrite as often as you like without waiting for anything to redraw. A few tips:
- Replace generic lines with real ones. If the bubble says “I love this place!” and your friend always says “this is the best day of my life” about every sandwich, use the sandwich line.
- Cut, then cut again. Comic bubbles read best at around ten to fifteen words. If a line is long, split it across two panels or move part of it into a caption.
- Point the tail at the speaker. Drag a bubble anywhere on the panel. The small dot aims its tail at whoever is talking, so the reader never wonders who said what.
- Use captions for time and place. “Three hours later” or “Meanwhile, at the goat farm” in a caption box saves you from forcing it into dialogue.
- Adjust the font size when a bubble feels crowded, rather than squeezing the words.
The layers control lets you hide bubbles or captions for a moment, which is handy when you want to look at the art underneath.
How do you change a scene or redraw a panel?
Sometimes the words are fine but the picture is not: the dog is the wrong color, the scene happens indoors when it should be on a beach, or a hand looks strange.
Select the panel and open its scene description. That is the short text the art is drawn from. Rewrite it to say what should be in the picture, for example “Leo on a red tractor, holding the wedding rings up in triumph, Anna laughing behind him, goats running alongside”. Then redraw the panel. The new version keeps your characters and your art style. You can do the same for a whole page.
Some practical advice:
- Describe what you want to see, not what is wrong. “No sunglasses” works less well than “Leo, eyes visible, squinting in the sun”.
- Change one thing at a time. If you rewrite the whole scene at once, you might lose the parts you liked.
- Redrawing uses credits, while text edits do not. That is why it pays to fix the cast and the story beats before polishing individual panels.
If a panel is rejected by the content filter, the editor tells you. Edit the scene description so it is clearly safe, and try again.
How do you fix a character that does not look right?
The character is built from the photo you uploaded, so most likeness problems come from the photo. Open the cast panel, select the character and replace its reference photo with a clearer one: front facing, even light, the full face visible, nothing covering the eyes or hair. Then redraw the panels where that character looks off.
You can also add a character later, for example a friend who turns up on page six, or a pet who deserves a cameo. Characters stay consistent from page to page once they are set, so this is the one fix worth doing early.
How do you add pages or change the ending?
If the story needs another scene, use Continue the story. Type what happens next, choose how many pages to add, and they are drawn in the same style and added at the end. This is the easiest way to add an epilogue, a proposal, a birthday surprise or a final page with a message to the recipient.
You can also delete a page you do not need. If you change your mind, undo and redo work as you would expect, and the Version history panel lets you save a checkpoint, such as “before the new ending”, and jump back to it later.

What should you check before you print?
When the comic is close, stop editing and read it as the recipient would. Not as the author, who knows what every panel means, but as someone holding it for the first time.
- Names and spelling. Check every name, nickname and date. A typo in a name is the one mistake everyone notices.
- Who is talking. Make sure each bubble points at the right person.
- The first and last page. The opening sets the tone and the last page is what they will remember. A short personal message on the final page works well.
- Pacing. If two pages in a row are just talking, consider redrawing one panel as an action moment.
- Tone. Inside jokes are great. Jokes that only you find funny, or that could embarrass someone in front of family, are worth a second look.
When you are happy, you can read the comic online, download it as a PDF, share a private link, or order a printed book. Printing is made to order, so leave time for production and delivery, especially in December. Our personalized comic book page shows what the printed book looks like.
What mistakes should you avoid?
- Using group photos for characters. Crop to one face per photo. A group shot makes it hard to tell who is who.
- Writing a timeline. “We met in 2015, moved in 2017, got a dog in 2019” makes a dull comic. Pick the moments and skip the rest.
- Polishing panels before the story is right. If you redraw art and then change the plot, you redo the work. Story first, art second, words last.
- Leaving the generated dialogue as it is. It is a good draft, not the final text. The best comics are the ones where someone sat down and rewrote every line in the voice of the people in it.
- Ordering print at the last minute. If time is short, give the digital comic on the day and order the printed copy as a keepsake.
The bottom line
Making your own personalized comic book now takes minutes. Making a good one still takes a little care, and almost all of that care goes into editing: the right photo for each person, the right moments, and dialogue that sounds like the people who will read it. Use an editor that lets you change every speech bubble, panel and page, fix things in the right order, and read it once as the recipient before you print. If you are still choosing a service, our comparison of the best personalized comic book gifts explains which ones let you edit and which write the story for you.